Choose your region and language
ApplyTile levelling system: what is it and why should you use one?
Reading time: approx. 5 minutes
Achieving a smooth, even tiled surface starts with proper preparation and correct installation. However, small height differences can still occur between adjacent tiles during installation. These are particularly noticeable with large-format and rectified tiles.
A tile levelling system helps minimise these height differences during installation. But how exactly does it work, and why are more and more professional tilers using one? Let’s take a closer look at the main benefits.

What is a tile levelling system?
A tile levelling system is a tool used to bring adjacent tile edges to the same height during installation. It helps minimise small height differences and keeps the tile edges aligned while the tile adhesive cures.
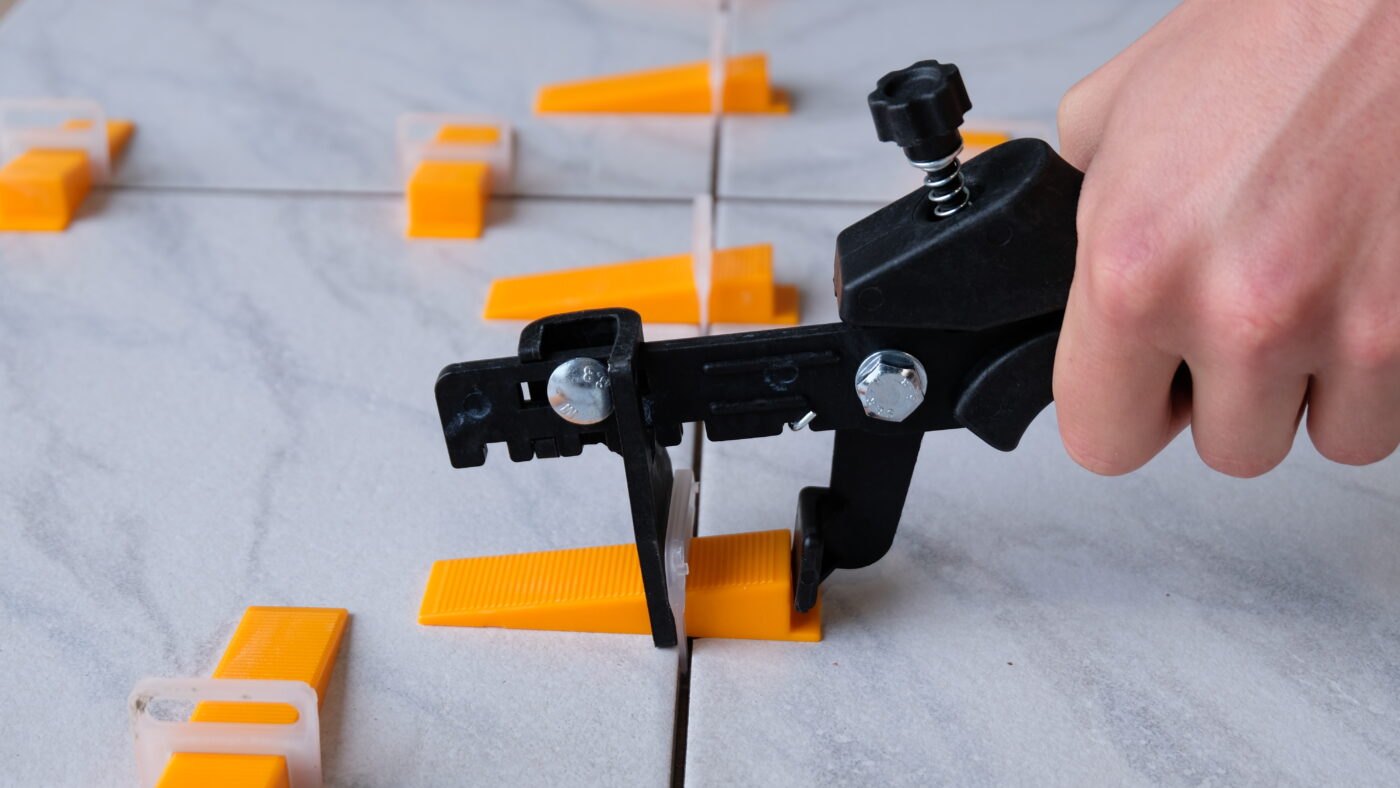
Depending on the system, you can use clips and wedges or clips and screw caps. The clips are positioned underneath and between the tiles. By tightening the wedge or screw cap, you bring adjacent tile edges to the same height.
A tile levelling system is not a substitute for a level substrate or proper installation techniques. Instead, it provides greater control when correcting small height differences during installation.
Why use a tile levelling system?
One of the main reasons for using a tile levelling system is to minimise lippage. This refers to the height difference between the edges of two adjacent tiles.
Even small height differences can be visible or noticeable underfoot. A tile levelling system helps minimise these differences during installation and provides greater control across a wide range of tiling projects.
4 benefits of using a tile levelling system
A tile levelling system offers several practical benefits during tile installation. Let’s take a closer look at the four main advantages.

1. Fewer height differences between tiles
The main benefit of a tile levelling system is that it makes it easier to bring adjacent tiles to the same height. By tightening the clip with a wedge or screw cap, the tiles are secured relative to each other, bringing their edges into alignment.
Without a levelling system, you need to check the height of the tiles yourself during installation and make manual adjustments where necessary. A levelling system makes this process easier and helps keep adjacent tile edges aligned while the adhesive cures. This reduces lippage and makes it easier to achieve a smooth, even tiled surface.
2. Fewer manual adjustments and more efficient installation
Using a tile levelling system involves a few additional steps, such as positioning the clips and tightening the wedges or screw caps. However, it also makes it easier to align tile edges and reduces the need for manual adjustments.
This can make installation more manageable, particularly when tiling larger areas. You have greater control over tile alignment and can correct height differences before the adhesive cures.
3. Suitable for different tiling projects
A tile levelling system can be used for both floor and wall tiles. It is particularly useful when installing large-format tiles, rectified tiles and tiles with narrow grout joints, where even small height differences are more noticeable.
Ceramic tiles can also develop slight variations in shape during the firing process. A levelling system helps minimise small height differences caused by these slight curves. However, it cannot straighten severely warped tiles.
4. Consistent grout joint width
With tile levelling systems where the clip also acts as a spacer, the thickness of the clip helps determine the distance between adjacent tiles.
Choosing the correct clip thickness makes it easier to maintain the desired grout joint width. This means the system not only helps align your tiles but also contributes to consistent grout joints.
How does a tile levelling system work?
The basic principle is straightforward. You position a levelling clip underneath the edges of two adjacent tiles. Depending on the system, you then insert a wedge or attach a screw cap.
Tightening the system brings the adjacent tile edges into alignment. The clips help keep the tile edges at the same height while the tile adhesive cures.
Once the adhesive has cured sufficiently, break off the protruding sections of the clips according to the product instructions. The wedges and screw caps can be reused.
The exact installation method varies depending on the system. With the Levelit wedge system, for example, you use levelling pliers to tighten the wedges in a controlled manner. The Helix screw cap system uses screw caps and requires no pliers.
Want to know how many clips you’ll need for your tiling project? Use the Levelit calculator.
Practical tips for using a tile levelling system
Using a tile levelling system correctly is just as important as choosing the right system. In the video below, Peter Goegebeur, head of BITA Tile Academy, shares his practical experience with the Levelit wedge system.
He explains why a tile levelling system is a useful tool and demonstrates several important techniques to keep in mind during installation.
The following tips specifically apply to the Levelit wedge system.

1. Position the clips at the correct distance
As a practical guideline, position the levelling clips approximately 10 cm from the tile corners. The spacing of any additional clips depends on the tile size and any variations in shape.
During installation, also check whether the tiles have any slight curvature. Where alignment is more difficult, you may need to adjust the positioning of the clips.

2. Pay attention to the direction of the wedges
Insert the wedges from the newly laid tile towards the previously laid tile.
Because the previously laid tile is already more stable, this gives you greater control when tightening the wedges and reduces the risk of the tile shifting.

3. Adjust the levelling pliers correctly and tighten the wedges
First, adjust the levelling pliers to match the thickness of the tiles. Then position the pliers correctly on the wedge and tighten gradually until the adjacent tile edges are at the same height.
Avoid applying excessive force, as overtightening can damage the clips.
What should you consider for the best results?
A tile levelling system helps minimise height differences between adjacent tiles, but proper preparation remains essential.
Make sure the substrate is sufficiently flat and suitable for tiling. Choose a tile adhesive that is appropriate for the tile type, substrate and installation conditions. Apply sufficient adhesive and always follow the adhesive manufacturer’s instructions.
A levelling system does not replace the skills of a professional tiler. It is a practical tool that gives you greater control over the final finish during installation.
Which tile levelling system is right for your project?
Choosing the right tile levelling system depends on several factors, including tile thickness, the desired grout joint width, the application and your preferred installation method.
Explore the full Levelit range of tile levelling systems and find the system that suits your tiling project.
Related articles
How to level tiles using a screw tile levelling system

How to use the levelit wedge levelling system