Discover our brochures
Discover the newest additions to the Levelit range in our latest catalogue.
Our brochures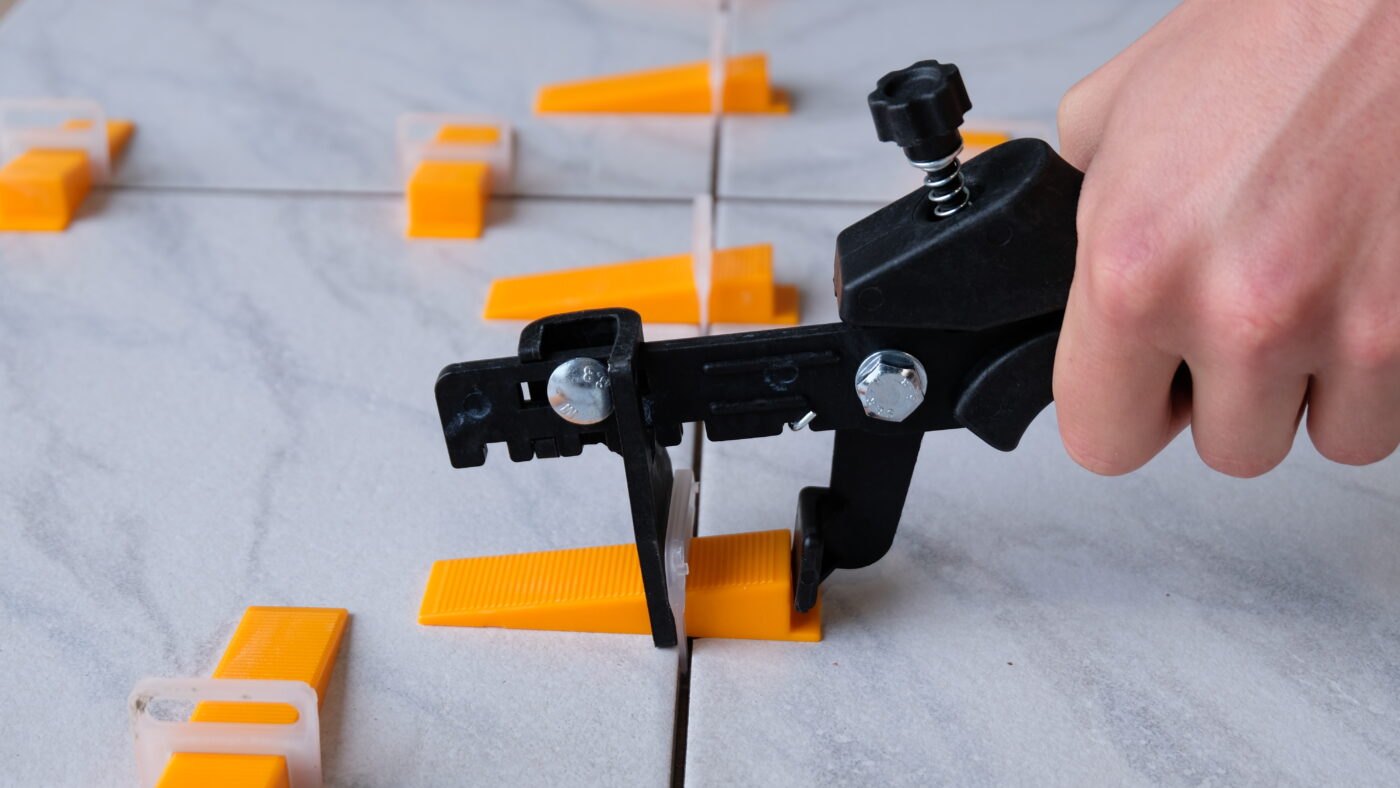
The best solution for quickly and easily laying tiles that are 100% level.
Find a dealer near you!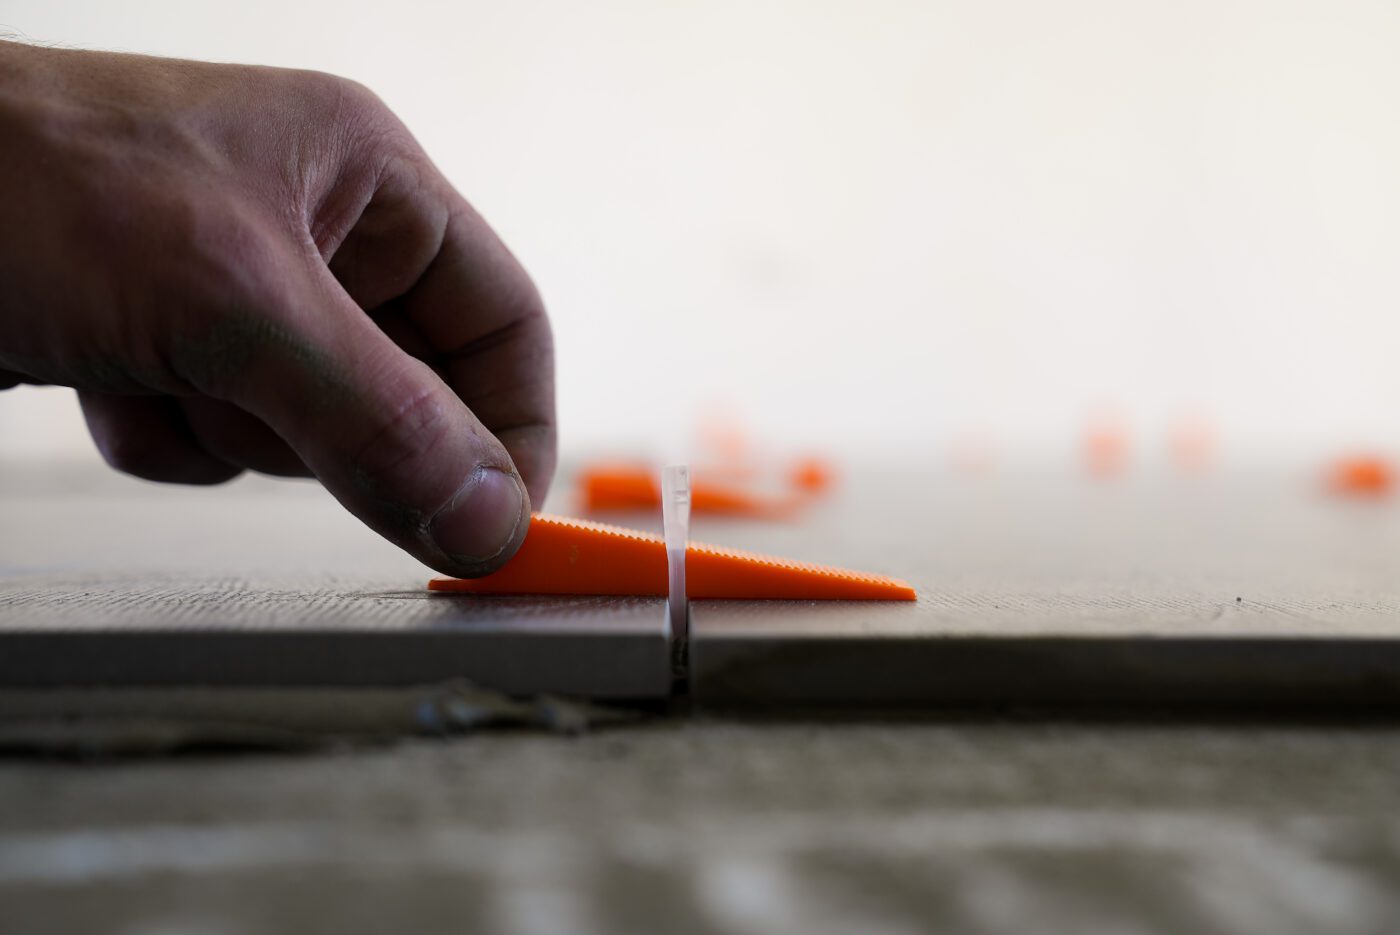

Discover the newest additions to the Levelit range in our latest catalogue.
Our brochuresThe overview below shows which brand is most suitable for you depending on tile thickness, desired joint width, application, and your level of experience.

The Levelit leveling system is ideal for large areas and large format tiles. This innovative wedge system empowers tilers to efficiently and precisely install floor or wall tiles, ensuring a perfectly flat surface.

The XL system is designed for thicker, heavier tiles, making it an excellent choice for outdoor tiling projects. These XL clips empower professional tilers to achieve impeccably level surfaces in outdoor areas.

Helix can be used on both walls and floors with medium-sized surface areas. Its ergonomic turn system proves particularly advantageous for tiling walls in bathrooms and kitchens, offering ease and efficiency in installation.

If you’re less experienced and only need to tile a smaller area with smaller tiles, the Tiling Buddy is your ideal partner. The clips are a bit smaller allowing you to lay tiles without needing to use pliers.

The Levelit systems simplifiy the installation of both wall and floor tiles. Using a leveling system tiles can be placed flat, aligned and with the perfect joint width! Large and thick tiles are no problem and are placed just as quickly and perfectly. On our wedge or turning systems page you will find an overview of all our products ranging from our Tiling buddy DIY tools, to a professional starter kit, and our full range of wedges and clips with 1-4 mm joint width
More about usWe believe it’s important to be close to hand – both for quick and easy advice, and to provide an efficient service. So we’ll happily put you in contact with our Levelit dealers in your area.
Any unevenness on the floor can result in tiles not being level. They can shift out of place or even collapse, which can be dangerous. You could easily trip. And that’s exactly why you should use a tile leveling system.
It’s the ideal solution for working with larger tiles, and for laying ceramic parquet tiles that are naturally slightly curved. You can always count on an perfectly laid, level floor. But the leveling system is also a great choice for smaller tiles, and for indoor and outdoor tiles alike.
Our systems includes all the components you need, such as push pliers, wedges, and clips – with the added bonus that you can lay tiles quickly.
When using a tile leveling system, you start by applying the tile adhesive. Then you slide the clips under the tile. You can use one or more clips on each side.
When the clip is in place, you can insert the wedge into the clip opening. Then use a plier to push the wedge through the clip. When the system is in place, you’re ready for the next tile. Now it’s just a matter of waiting. The adhesive needs time to almost fully dry. Once the adhesive is almost completely hard, remove the visible part of the clip by tapping it in the direction of the joint.
Tile levelling systems offer a number of benefits. You can lay all your tiles in one go, for example, and start walking on your new floor sooner. The clips and wedges also hold the tiles together properly while laying them, and automatically ensure you always have the same joint width.
Are your tiles thinner than 6 mm? No problem if you’re using a leveling system. You’re sure to end up with a perfectly laid floor which you can enjoy for many years. When considering your options, you’ll discover a tile leveling system with standard clips and wedges , among others. You can use this system to lay tiles evenly, with the clips and wedges doing all the work for you.
The clips are available in various thicknesses, such as 1, 1.5, 2, 3 and 4 mm, and the placement pliers are made from plastic so they’re easy to handle when inserting the wedges firmly in the clips. You can of course also opt for metal pliers.
There’s also a tile leveling system with cross-shaped clips and tile caps. The advantage of this principle is that you lay part of your floor quickly, and remove it just as easily. The joint crosses ensure that you always have the same joint width between the edges and tiles.
When determining which tile leveling system is best for you, it’s important to consider what tiles you’ll be working with.
Most systems are suitable for tiles that are 3-13 mm thick. If you’re choosing a thicker tile up to 20 mm, then it’s best to opt for a large leveling system.
The joint width is also a factor in choosing the right tile leveling system. This depends on your personal preference to some degree.
There are various systems available, e.g. for joints widths of 1, 2, or 3 mm. It is often recommended to always have a minimum 2 mm joint width.


![]()
![]()
![]()
![]()

