Choose your region and language
ApplyHow to use the levelit wedge levelling system
Want to install tiles accurately using the Levelit wedge system? It’s important to position the clips correctly, insert the wedges in the right direction and adjust the levelling pliers properly.
In this article, we’ll explain step by step how to use the Levelit wedge system, from positioning the first clips to removing them once the tile adhesive has cured. You’ll also discover which common mistakes to avoid.
What do you need to level tiles with the Levelit wedge system?
The Levelit wedge system consists of three components:
- Levelling clips: Positioned underneath the tile edges to determine the grout joint width.
- Reusable wedges: Inserted through the clips to bring adjacent tile edges to the same height.
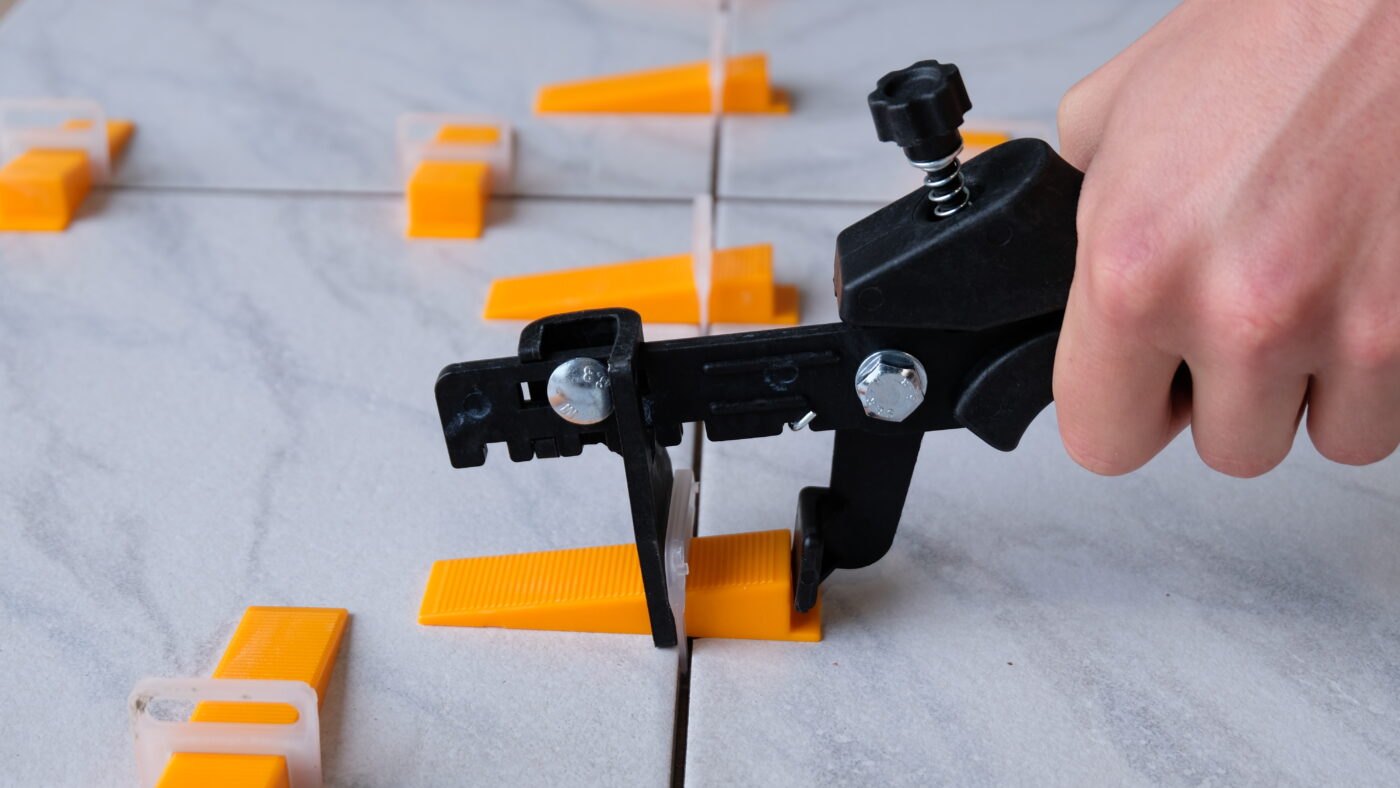
- Levelling pliers: Used to tighten the wedges in a controlled manner.
Choose the correct clips based on the tile thickness and desired grout joint width. Make sure you adjust the levelling pliers correctly before use.
Want to learn more about how the Levelit levelling system works? Watch the video below.
How do you use the Levelit wedge system?
With the right preparation and installation technique, you can use the Levelit wedge system to minimise height differences between adjacent tile edges during installation.
Follow these steps.

Step 1. Apply the tile adhesive and position the first tile
Prepare the substrate and apply the tile adhesive according to the adhesive manufacturer’s instructions. Position the first tile in the desired location. Check that the tile is correctly positioned before inserting the levelling clips.

Step 2. Position the levelling clips
Slide the clips underneath the edges of the first tile. As a practical guideline, position them approximately 10 cm from the tile corners. The spacing of any additional clips depends on the tile size and any variations in shape.

Step 3. Position the next tile
Place the adjacent tile against the clips and carefully press it into the tile adhesive.
Check the position of both tiles and look for any height differences between their edges.

Step 4. Insert the wedges in the correct direction
Slide the reusable wedges through the openings in the clips.
Insert the wedges from the newly laid tile towards the previously laid tile. Because the previously laid tile is already more stable, this gives you greater control when tightening the wedges and reduces the risk of it shifting.

Step 5. Adjust the levelling pliers and tighten the wedges
First, adjust the levelling pliers to match the thickness of the tiles. Then position the pliers correctly on the wedge and tighten gradually until the adjacent tile edges are at the same height.
Avoid applying excessive force. Overtightening can damage the clips.

Step 6. Allow the tile adhesive to cure
Leave the clips and wedges in place while the tile adhesive cures. Follow the adhesive manufacturer’s recommended curing time and the levelling system’s removal instructions.

Step 7. Remove the clips and reuse the wedges
Once the tile adhesive has cured sufficiently, break off the protruding sections of the clips according to the product instructions.
The bottom sections of the clips remain underneath the tiles. Collect the reusable wedges so you can use them again on your next tiling project.
Common mistakes when using a wedge levelling system
Correct installation is essential to ensure the levelling system works properly. Keep the following points in mind:
- Choosing the wrong clips: Check that the clips are suitable for the tile thickness and desired grout joint width.
- Positioning the clips incorrectly: Consider the tile size and any slight curvature. Adjust the spacing of the clips if necessary.
- Incorrectly adjusting the levelling pliers: Adjust the pliers to match the tile thickness before tightening the wedges.
- Overtightening the wedges: Apply pressure gradually to avoid damaging the clips.
- Trying to correct an uneven substrate: Make sure the substrate is suitable and sufficiently flat. A levelling system is not a substitute for proper surface preparation.
Which tiles are suitable for the Levelit wedge system?
The Levelit wedge system can be used for both floor and wall tiles. The clips you need depend on the tile thickness and desired grout joint width.
Standard Levelit clips are suitable for tiles with a thickness of 6 to 12 mm. When combined with the wedge separator, they can also be used for tiles with a thickness of 3 to 6 mm.
For thicker tiles, specific versions are available within the Levelit XL range. Always check which clips are suitable for your application.
Levelit XL clips are suitable for tiles with a thickness of 15 to 25 mm. The XXL clips with a 3 mm grout joint width are suitable for tiles with a thickness of 22 to 30 mm.
Want to know how many clips you’ll need? Use the Levelit calculator.
Discover the Levelit wedge system
The Levelit wedge system allows you to align adjacent tile edges accurately during installation. By positioning the clips correctly and tightening the wedges in a controlled manner, you can minimise unwanted height differences.
Explore the Levelit wedge system and discover which clips and wedges are suitable for your tiling project.
Related articles
How to level tiles using a screw tile levelling system
How to use tile levelling pliers: how to adjust them correctly
