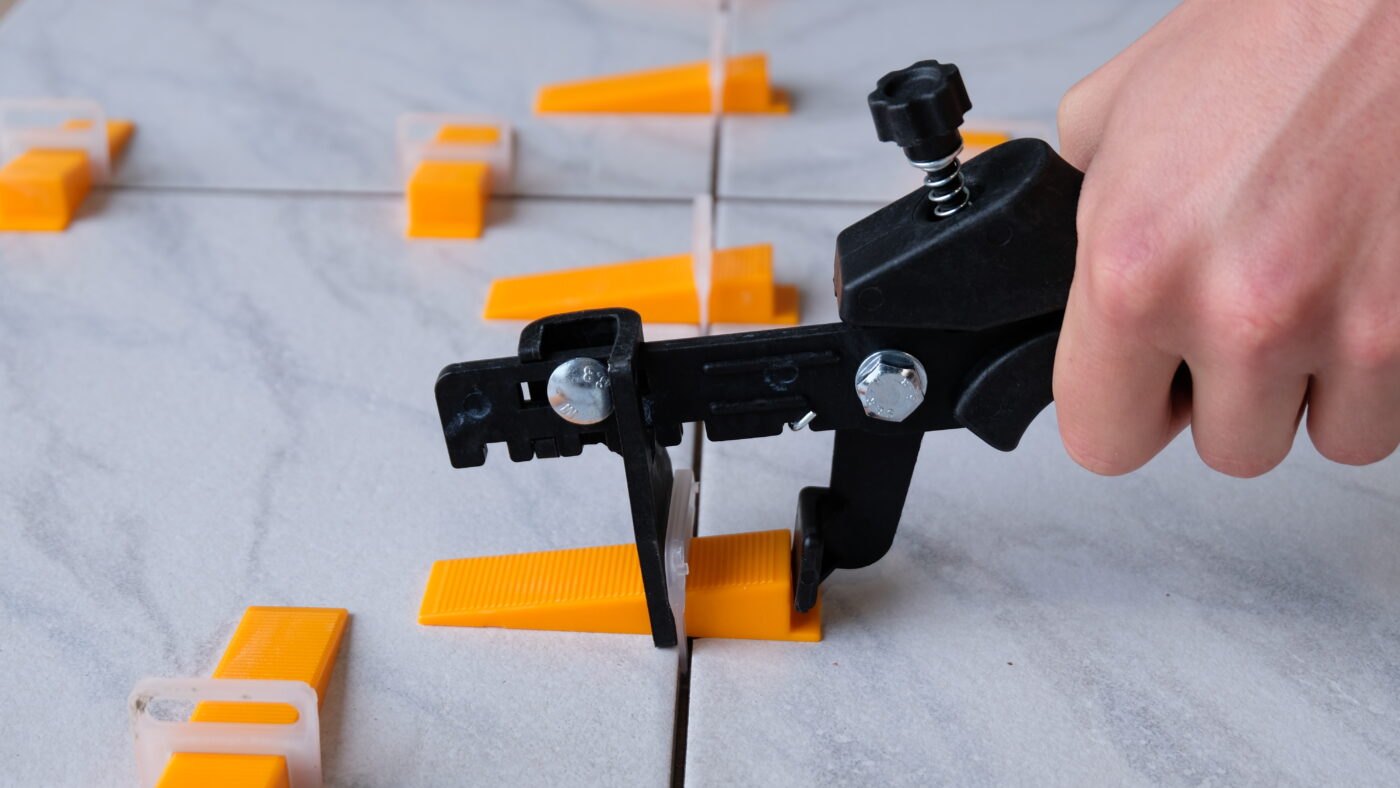
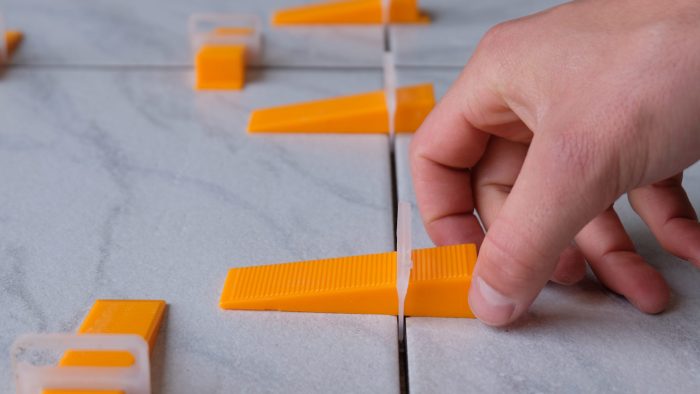
Levelit – Wedges (3 -25 mm tile thickness) are suitable for various tile thicknesses and joint widths.
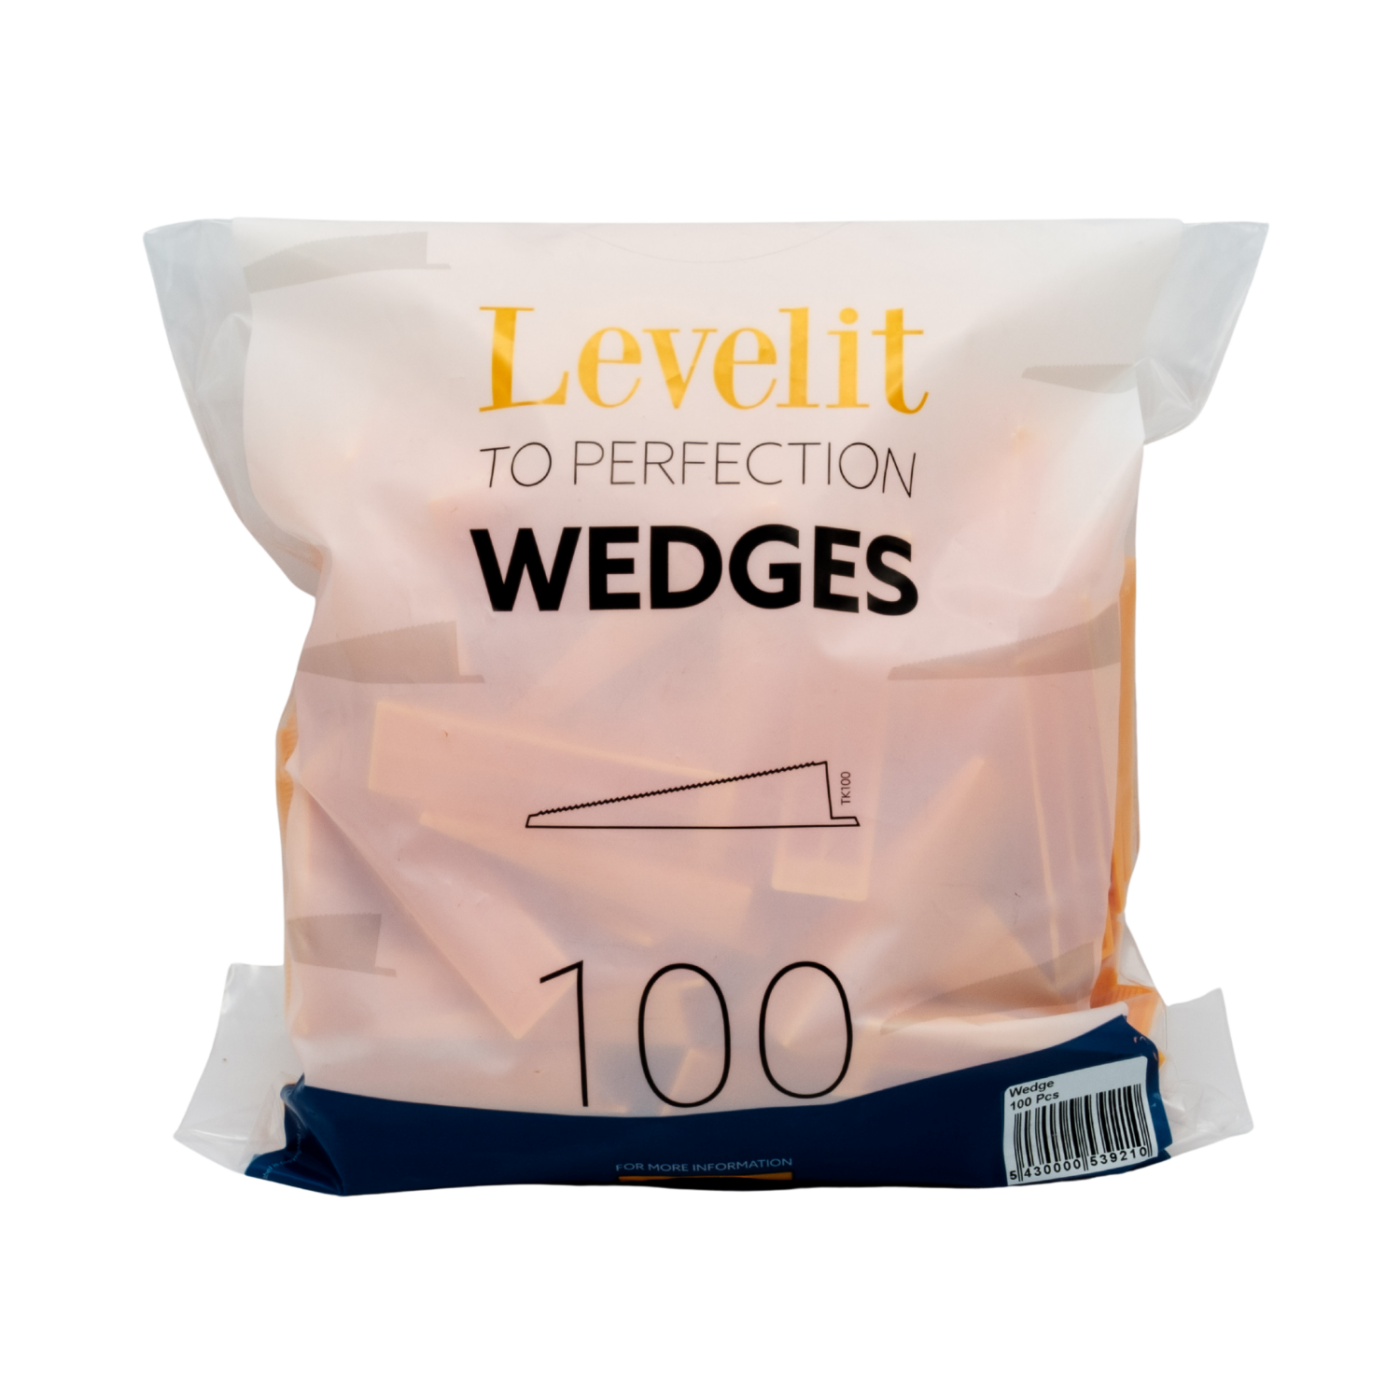
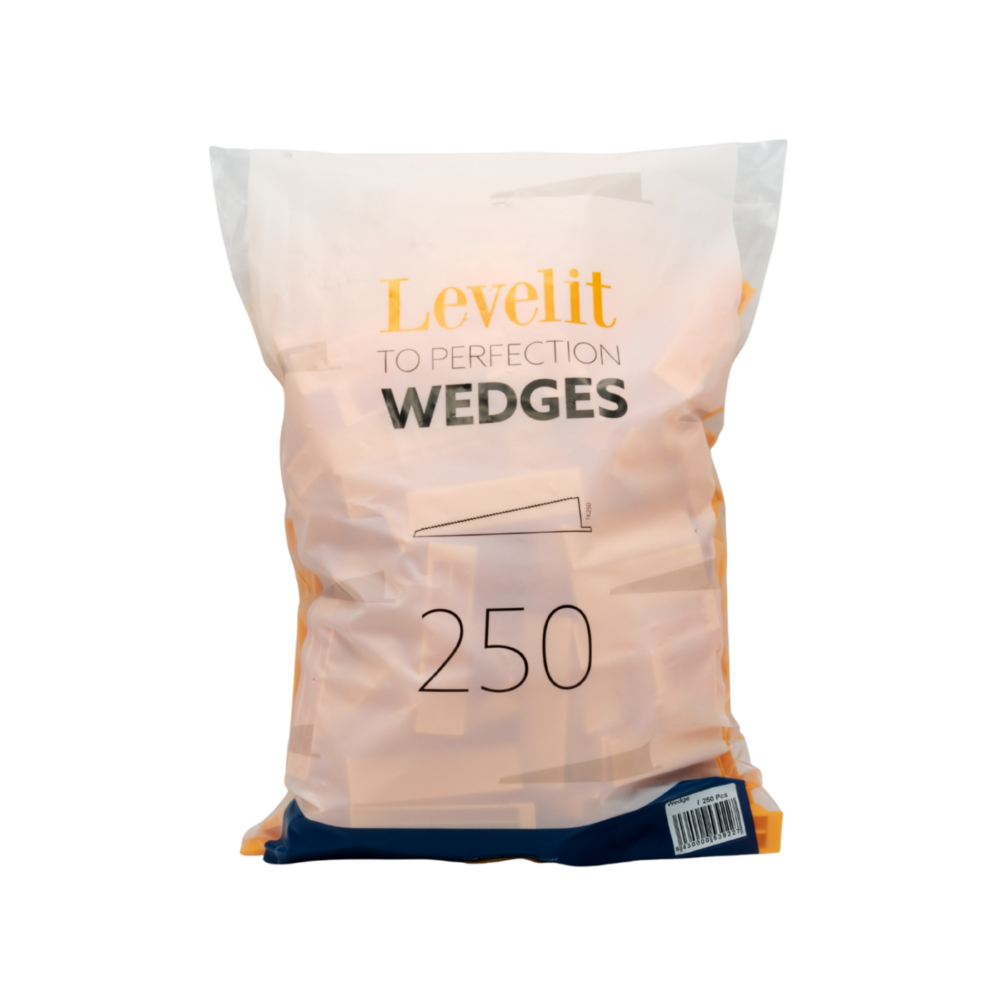
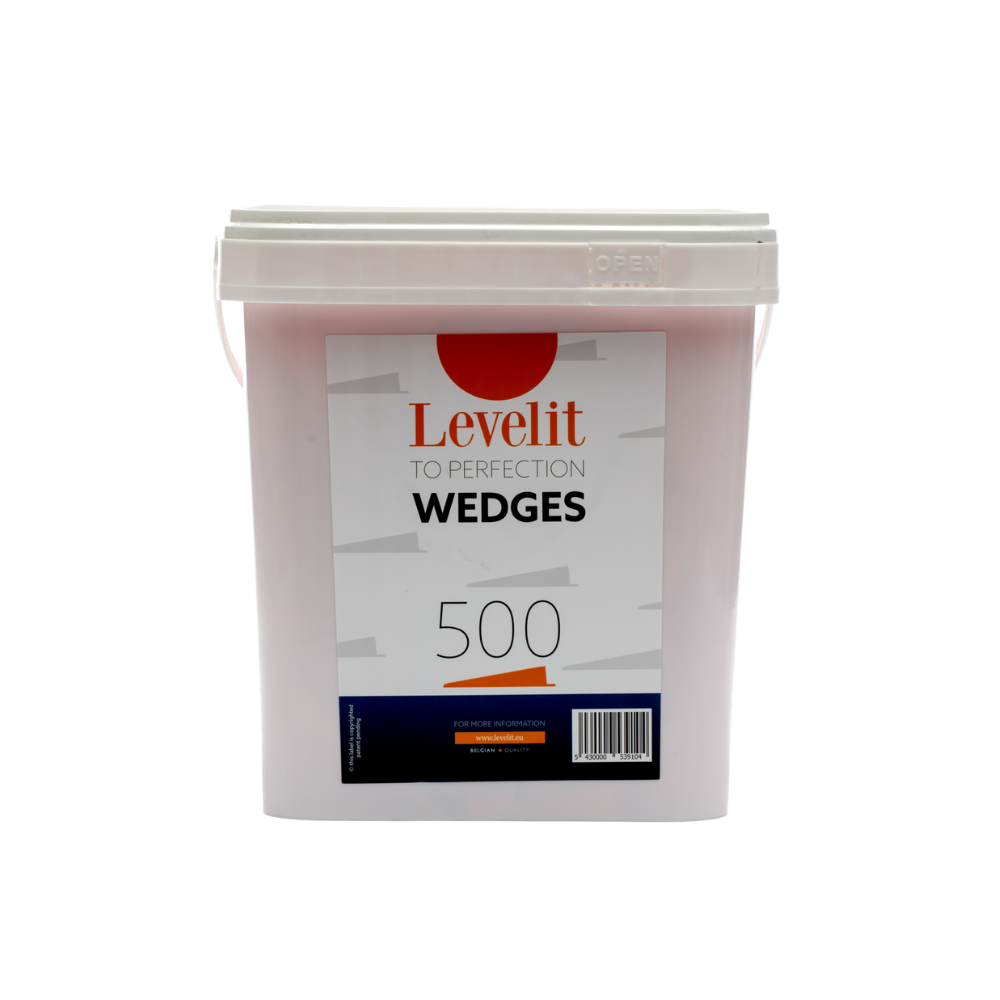
Our range is available in packs of:
- 100 wedges
- 250 wedges
- 500 wedges
- 2000 wedges
The wedges are suitable for tiles with a thickness between 3 and 25 mm. A wedge separator is required for thinner tiles < 6 mm
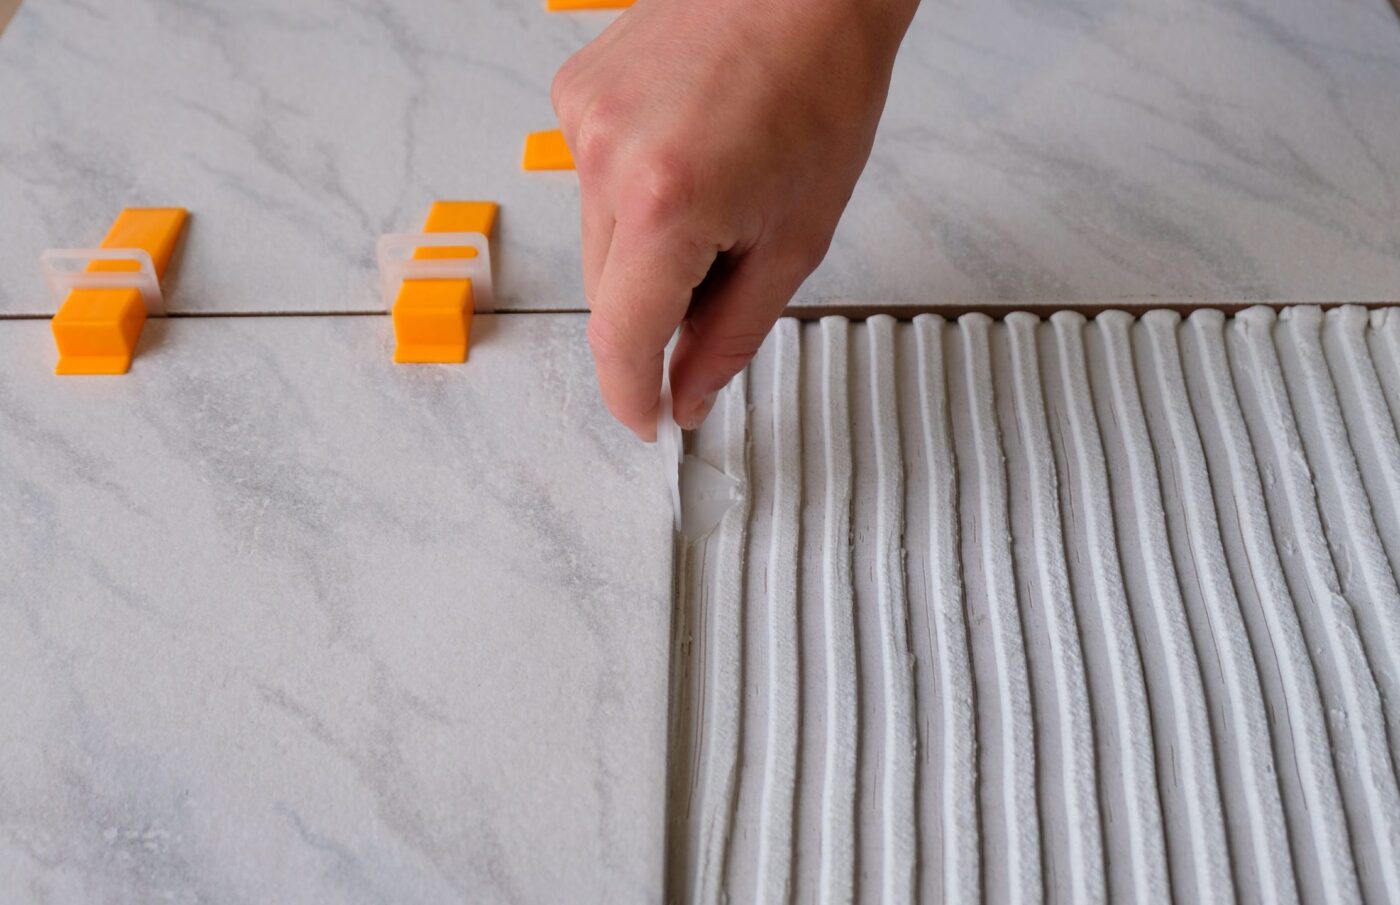
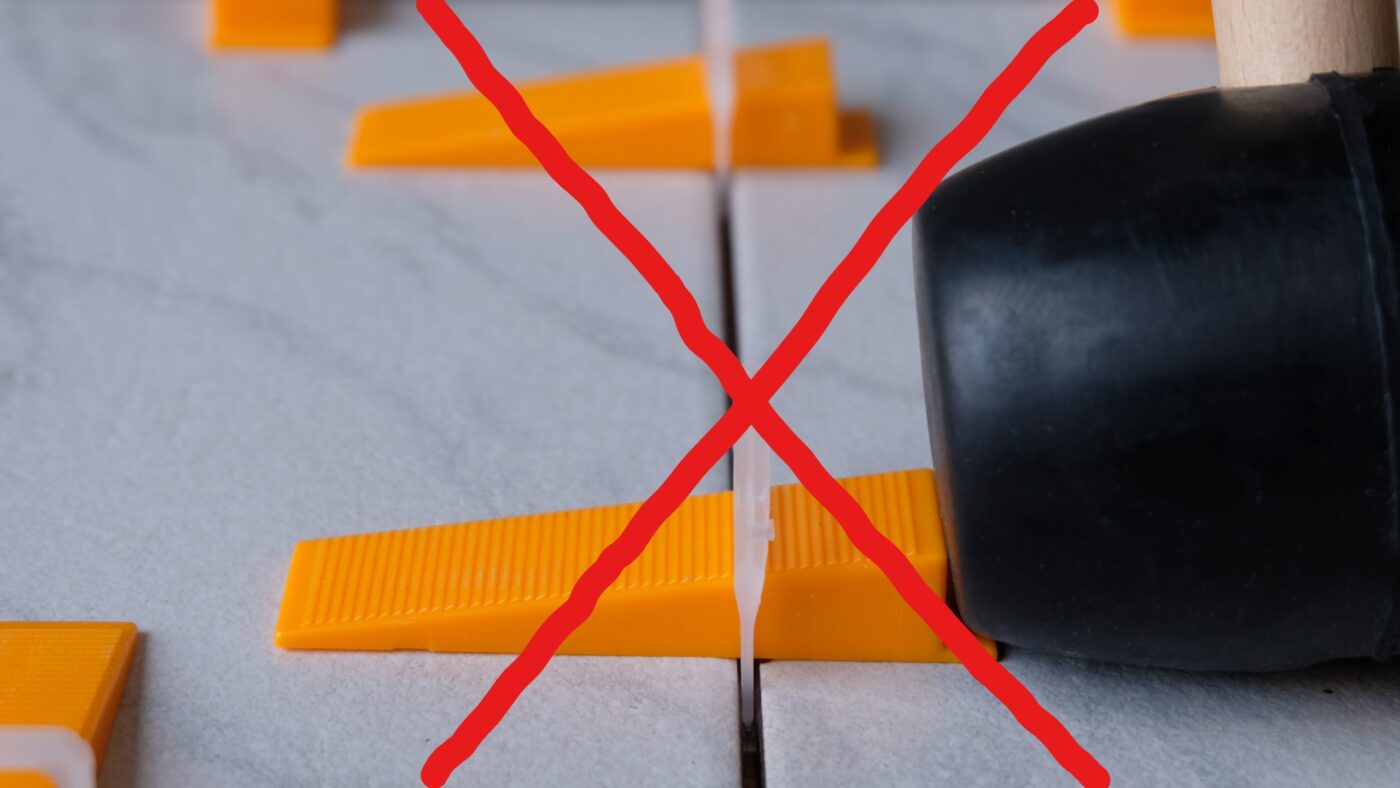
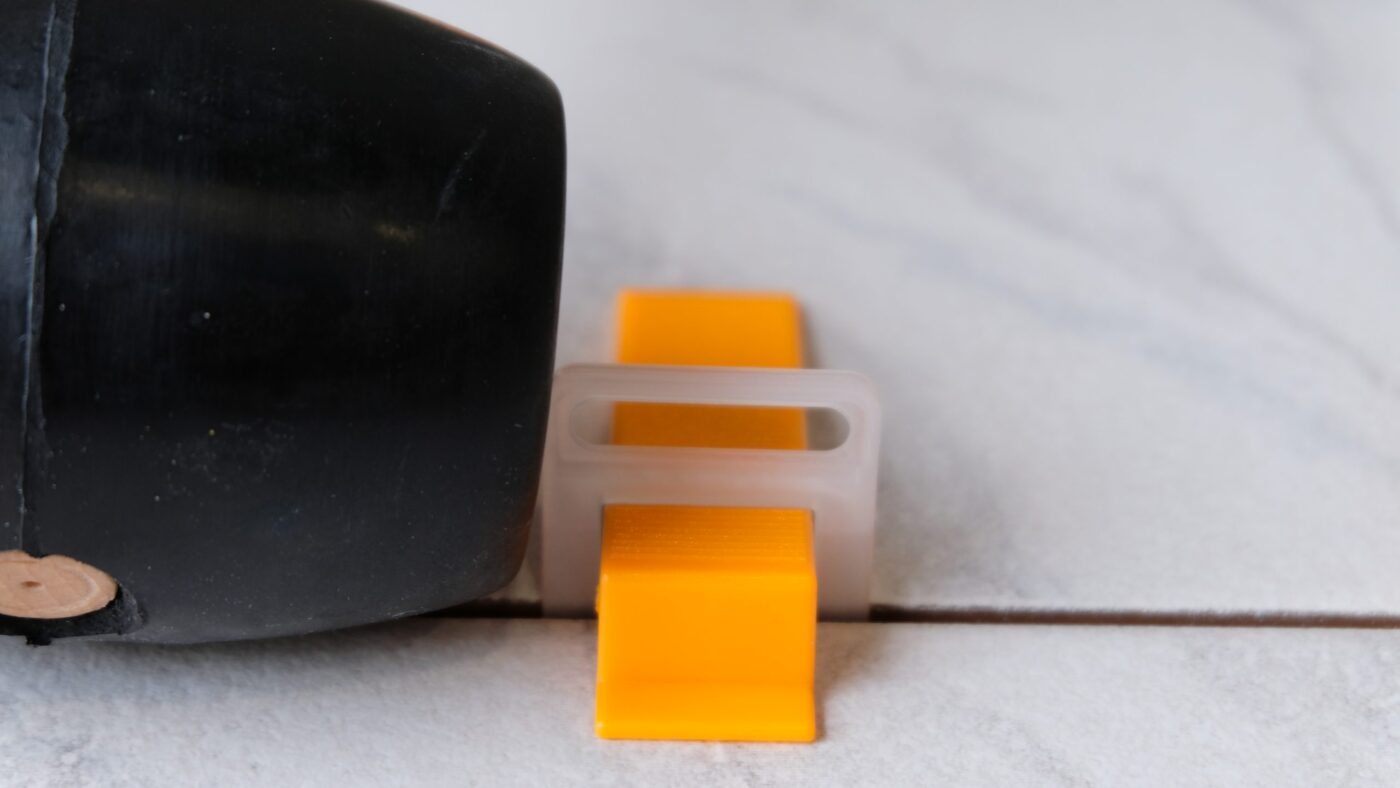
These wedges are available as a complete leveling set. These sets contain the same number of clips and wedges and a plier, so you can get started right away, and always have enough clips and wedges.
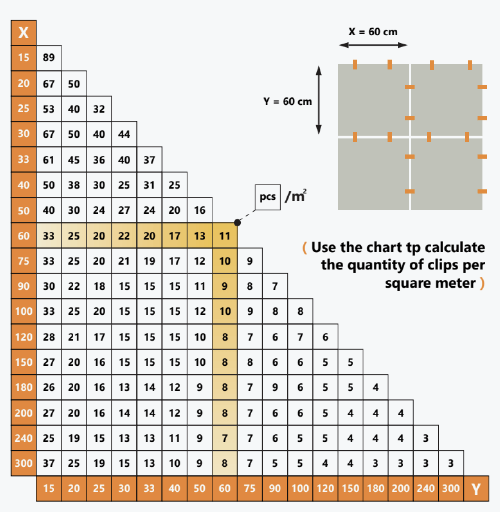
How many caps and wedges do I need?
The number of spacer clips and wedges required depends on the size of the tiles. You can find the recommended quantities on the “Calculation Chart” tab.
Use the calculator app to work out how many clips you need according to the tile size and surface area to be tiled.