


Laying tiles with a tile leveling system
Do your own tiling
Are you going to lay a floor and do your own tiling? Then you might have a lot of questions. Where do you start, for example? And do you need a leveling system? And what benefits does this offer? To help guide you along the right tracks, we provide you with a step-by-step plan in this article to properly prepare you before you get started!
Make a good start and you’re already half way there!
Before you start laying tiles, it’s always a good idea to stop and consider a number of issues. You might need underlayment, for example. These are panels that you lay as a foundation on the subfloor to then lay the tiles on. If you’re doing your own tiling in a wet room such as a shower, it’s important to use a watertight kit. This kit consists of waterproof tape to seal the edges and joints, and a coating to prevent any moisture from getting behind the tiles so you avoid the risk of any cracks or mold forming. You also definitely need to use a primer. This ensures the base layer is not porous, so the tile adhesive has enough time to bond properly, and tiles do not become loose at a later date.
Do your own tiling: some points for attention
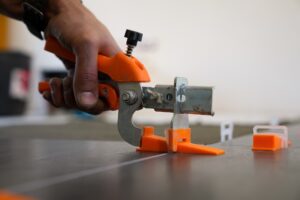
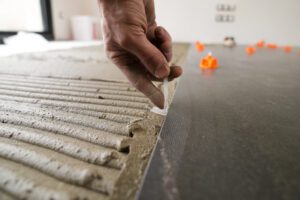
OK, so now it’s time to lay your tiles. There are a few more points to keep in mind at this stage. Firstly, make sure you keep a close eye on the tile adhesive drying time, so that it doesn’t become too dry or hard before you’re ready. When you start to lay your tiles, begin by applying the tile adhesive for the first row. If you’re using thin tiles, doing heavy-duty tiling, or have tiles larger than 40×40 cm, you can use the buttering-floating method for this. This means that you completely cover both the bottom of the tile and surface you’re tiling with adhesive, to make sure your tiles remain in place. Use tile clips and wedges to keep the tiles in place while the adhesive dries and hardens. These clips and wedges ensure the tiles are all laid level with equal gaps between them.
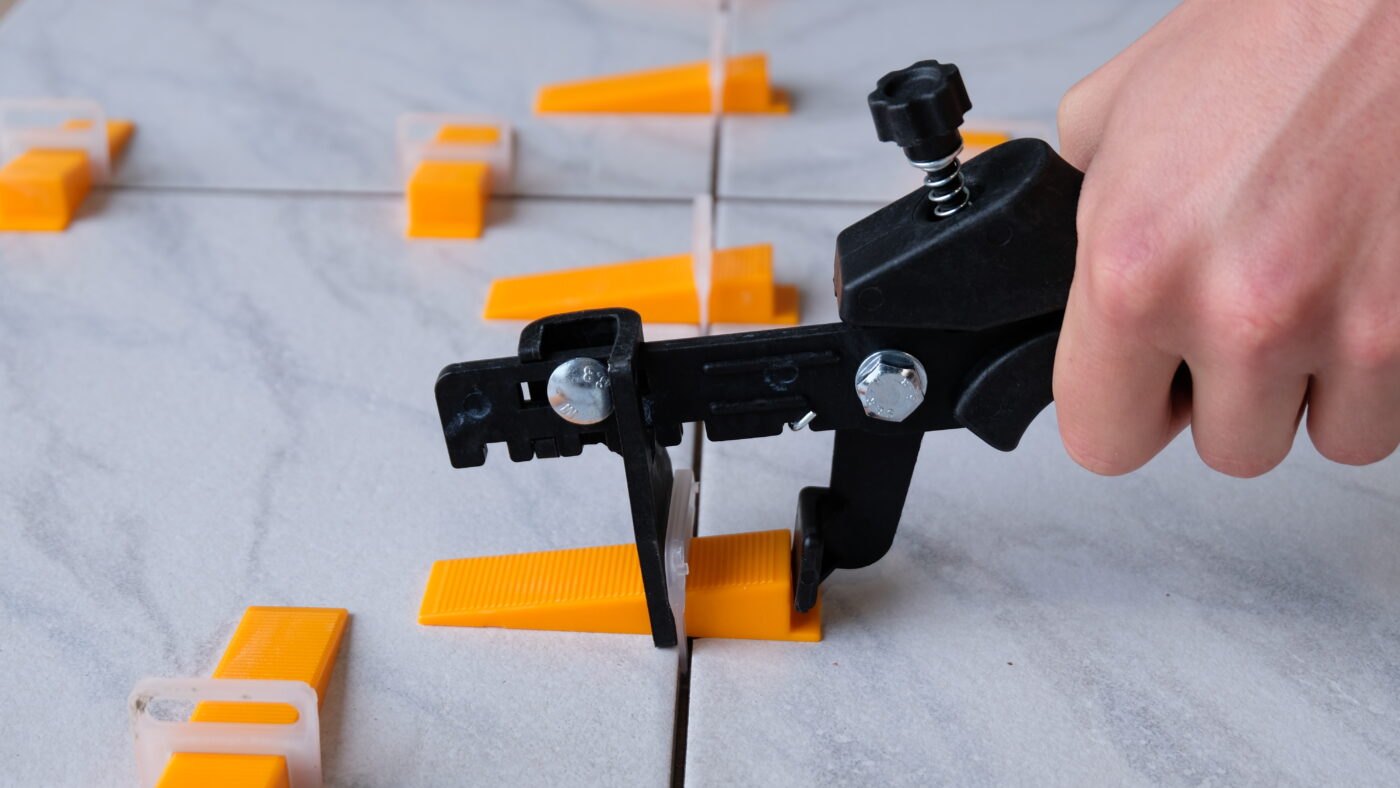
Tile leveling systems: should you use one or not?
Tile leveling systems are excellent for making sure your tiling is neat and flat. They prevent unevenness and height differences between the floor or wall tiles, and ensure you end up with a good result. A tile leveling system consists of wedges, clips, and metal or plastic pliers, and anyone can use one. You simply slide the wedge into the clip opening. So if you’re doing your own tiling, you don’t need to worry about collapsed or displaced tiles. Another big benefit is that you can lay your tiles quickly and flawlessly, and you’re guaranteed to end up with a flat, smooth result. It’s also useful if you’re working with larger tiles, which you can choose to lay horizontally or vertically.
Measuring and cutting your tiles to size
When doing your own tiling, making precise measurements is a job you have to get right. It’s always a good idea to start by doing a practice round where you lay the tiles without using adhesive to stick them in place. Start in the middle and see how you end up. This still gives you the option to shift tiles if you’re left with less than half a tile at the edge. Don’t just think about where to start, but also how to lay the tiles to make sure you always end up at the door. You’ll realize that you have to cut tiles to make them fit in the corners. So you could, for example, lay all the whole tiles first and then finish off with the customized tiles, or you could cut them to the right size and lay them first. It’s best to measure any leftover areas accurately before cutting the tiles. You also need to keep in mind that you should leave a little gap by the walls to compensate for the house’s natural shrinkage and expansion process.
Grouting and finishing
Grouting is an important part of the tiling process, to prevent any moisture getting under the tiles. You can start grouting after about 24 hours once the tile adhesive is completely hard and dry. Spread the grout over the joints and leave to dry thoroughly. You also need to remember to clean the tiles with tile cleaner, to get rid of any cement residue. Finally, apply a watertight sealant layer between the floor and the wall, to prevent dirt and moisture from getting behind the seams. When you’ve done all this, it’s high time to stand back and admire your work!
Calculator apps
Find a dealer
SearchRelated articles
Tips for using a tile levelling system
